Blogger used to use Feedburner for this as both platforms where Google owned. Unfortunately the e-mail subscription services of Feedburner have been decommissioned, leaving me (and many others) without a way of notifying readers when a new post becomes available.
Basics first - RSS what?
RSS stands for Really Simple Syndication, it's a standardized, computer-readable format of content.
An RSS feed is a way for subscribers to easily receive updates from websites they follow. Think of it like a newsletter that's automatically delivered to you. Whenever the website updates with new content, you'll receive the update in your RSS reader or mailbox (or both), so you don't have to constantly manually check the website for new posts.
To use an RSS feed, you'll need to sign up for an RSS reader. Then, you can subscribe to the RSS feed of any website you're interested in following. Every time the website updates with new content, you'll receive a notification in your RSS reader, and you can read the new post with just one click.
For now I've chosen follow.it to publish my feed, as they seem to have a simple and straightforward approach. I might change the tooling later, but let's see how this goes :)
Publishing a feed
So let's set this up! To publish a feed:
- Go to follow.it and sign up.
- Setup your source by entering your website or RSS url in the "Add the follow feature to your site" box on follow.it/ni, click "Next".
- Pick the RSS feed, typically the first one will be the correct one, so in case of doubt, choose that one. If you have others, it's likely related to previous RSS configurations. Click "Continue".
- Next, you'll have some options to either select an existing signup form or create a new one. I created one through follow.it and customized it to match the style of the blog.
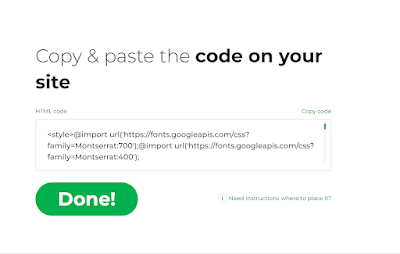
- Once done, click "Continue" and scroll down to find the embed code at the bottom of the page.
- Embed the code on your website. Depending on which type of website you have, the steps below might not be applicable to you. For more information on how to embed the form depending on the type of website, see https://follow.it/docs/publishers/getting-started/how-do-i-embed-the-follow-form-on-my-website. Below you can find the steps for Blogger.
- In your Layout section on Blogger, add a new "Html/Javascript" widget and drag it to where you want the form to appear.
- Edit the widget and copy paste the embed code for the signup form in this widget. Hit "save".
- Refresh your blog and check out your new form. I'm not 100% happy with how it looks but I'll tweak it later.
- In the next steps of the follow.it wizard, you can choose follow icons and a pop-up to add to your website.
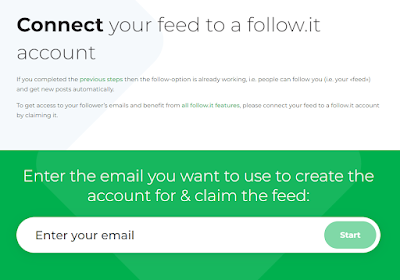
- In the last step there is the link to claim the feed, which is important so don't forget this step! Enter your e-mailadress in the box and submit. You'll receive an e-mail with instructions on how to claim. You can chose to upload an HTML file or add a meta tag.
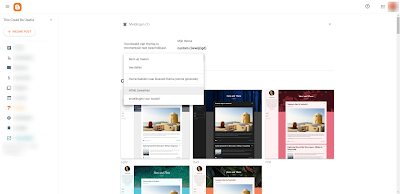
- I went for the meta tag approach as it's the least amount of effort in the case of using Blogger. To do so, edit your theme, click on "Edit HTML" to open the HTML editor.
- Add the meta tag (the exact HTML will be in the e-mail you received) to your head tag and save the page. There will be a link in the e-mail you received to claim the feed once you've done the configuration. Go ahead and click that link to claim the feed. Follow.it will try to detect the meta tag, once found, it considers you as the owner of the RSS feed.
- When you login to your follow.it account, you'll now be able to see a dashboard of Followers, Statistics, Sending and Settings for your feed.
Subscribing to a feed
Good news, I've got the perfect blog for you to test this subscription on!
There's two ways to do this; from the blog directly or from follow.it itself. Let's check out how to do this for both approaches.
Subscribing from a website or blog directly:
- Go to the website or blogs signup form and enter your e-mail address, click the "Subscribe" button.
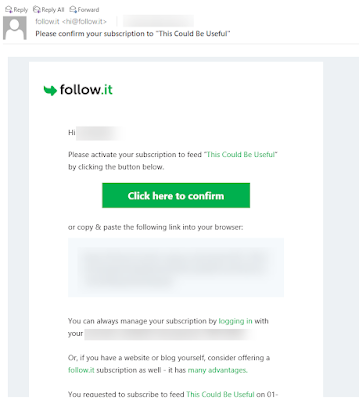
- You'll receive an e-mail confirmation, confirm to subscribe to the feed. This will sign you up for the Newspaper channel: "Receive messages of the last 24 hours in one email per day". To change this or choose additional channels, you'll need to create an account.
- Optionally: you can create an account to manage your subscriptions on the follow.it website.
Subscribing from the follow.it website
- Go to follow.it and sign up for a free account.
- Follow the steps on the website and pick your source by entering the website or RSS url.
- Pick the RSS feed, typically the first one will be the correct one, so in case of doubt, choose that one.
- Filter the feed, this is relevant for very big feeds where you might only be interested in part of the content but not everything, think news websites.
- Select your output channels, this allows you to choose how you want to receive the updates, you can select several e-mail options such as grouped or individual messages but also social media channels such as Telegram or Twitter.
- All done! You will now receive updates through the selected output channels. To see all of the feeds you follow, in follow.it, go to Reading > Feeds.
Now you are all setup, please don't forget to signup for the This Could Be Useful feed by using the signup form at the bottom of the page or the button at the end of the post. Thanks!
What RSS publisher or reader are you using? Do you have any experience with follow.it? Do you use RSS feeds often? Let me know in the comments.
Could be useful, right?
(this post is NOT sponsored, the links to follow.it however link to an affiliate url which do benefit This Could Be Useful if you were to publish your feed through it)


No comments:
Post a Comment